If you’re downloading the installer from within macOS Tahoe, you’ll see a pop-up when the download completes, telling you that the installer can’t be run from within that version of macOS. Since we’ll be running it off of its own USB stick, you can safely ignore this message.


Andrew Cunningham
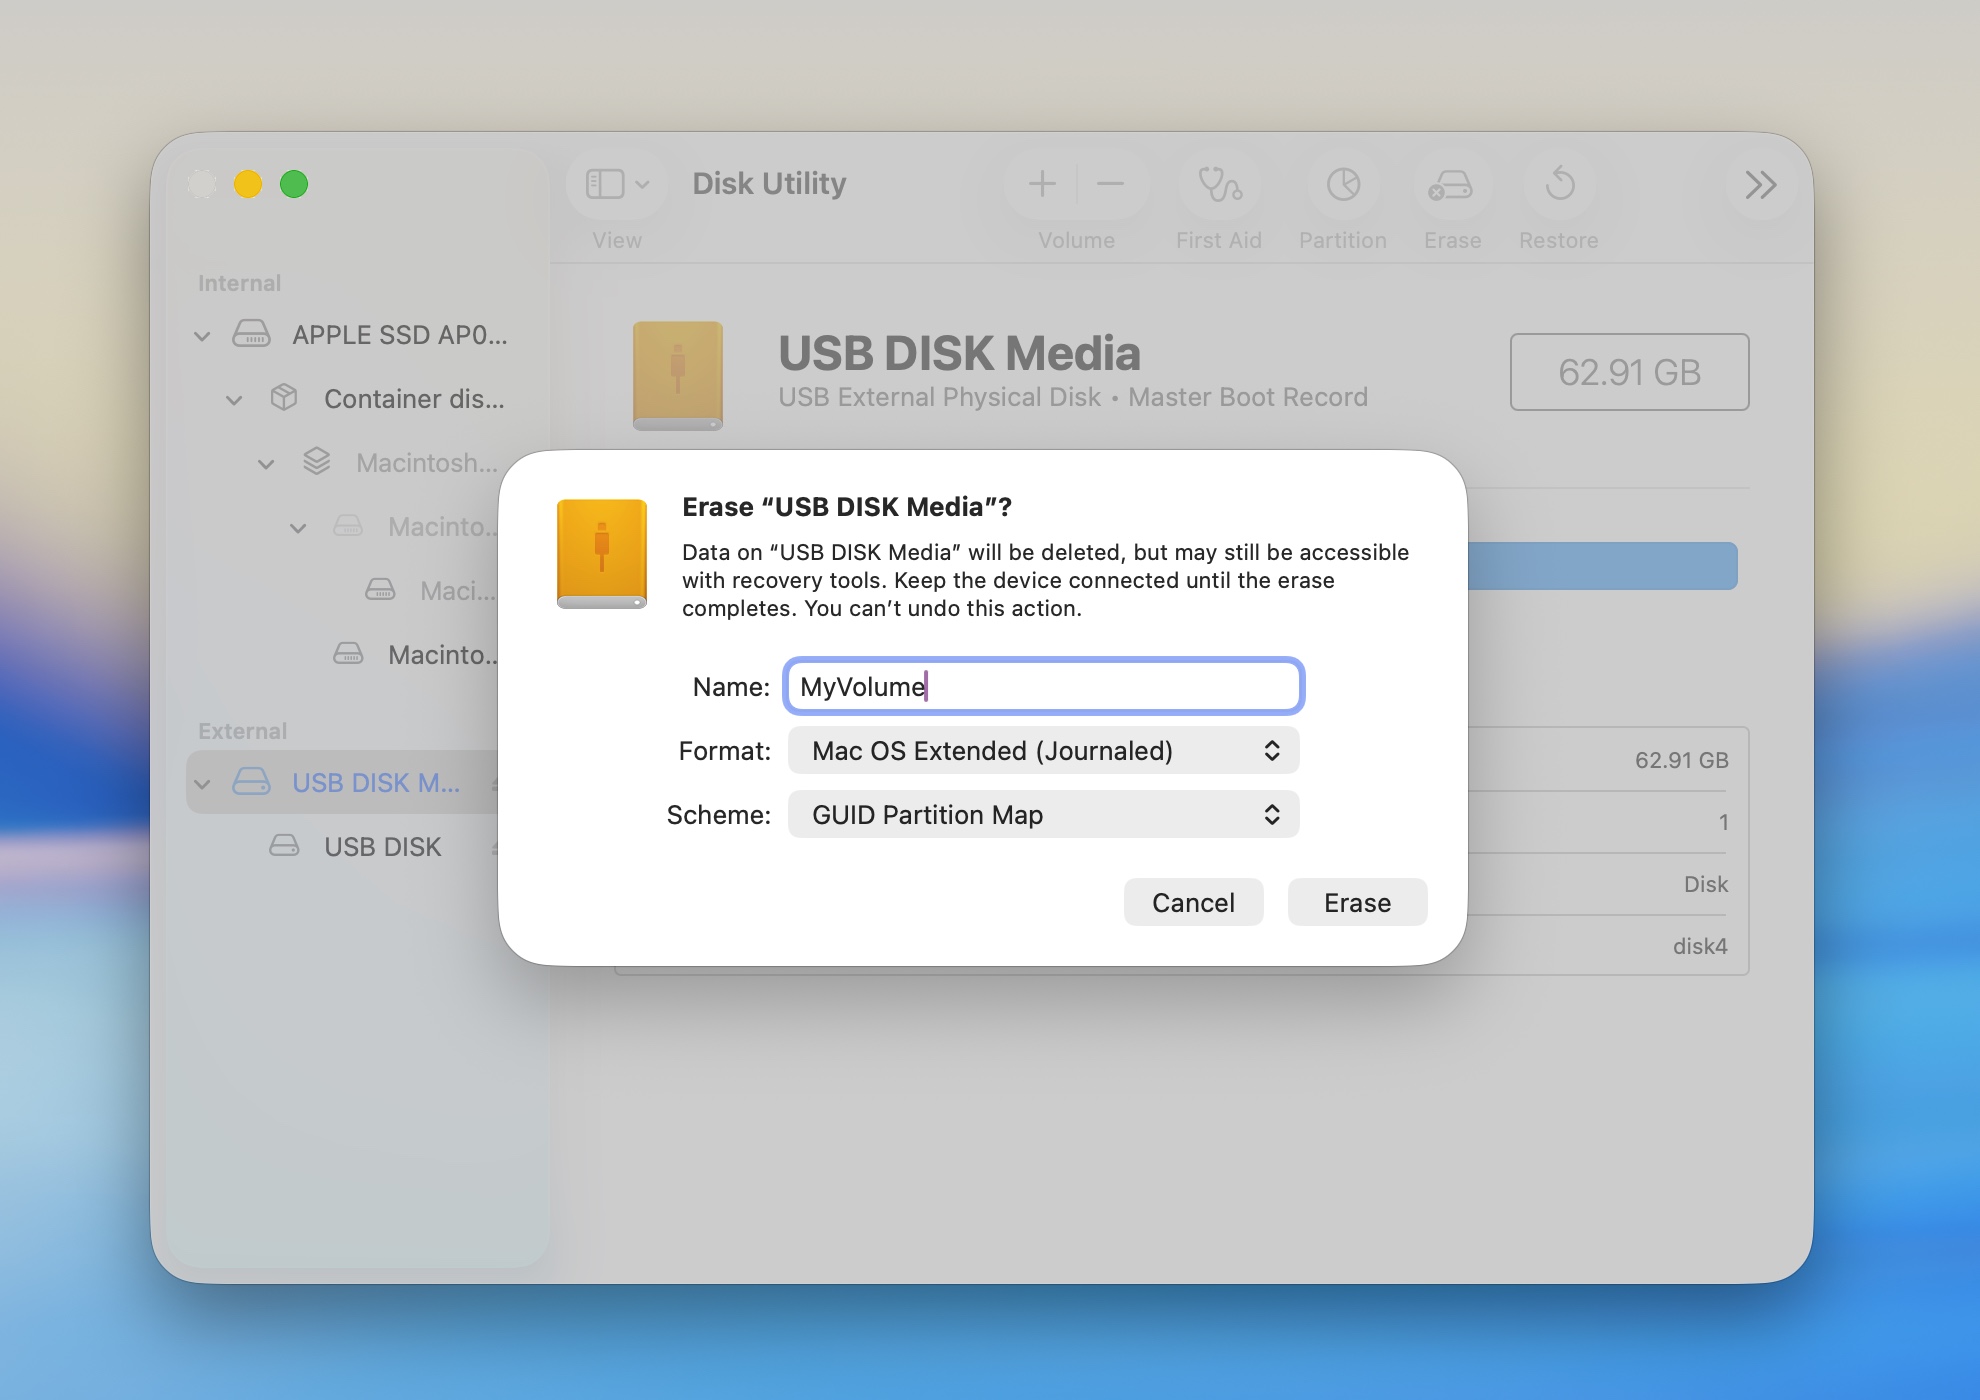
Settings for formatting your USB disk to get it ready for a macOS installer.
Andrew Cunningham
Andrew Cunningham
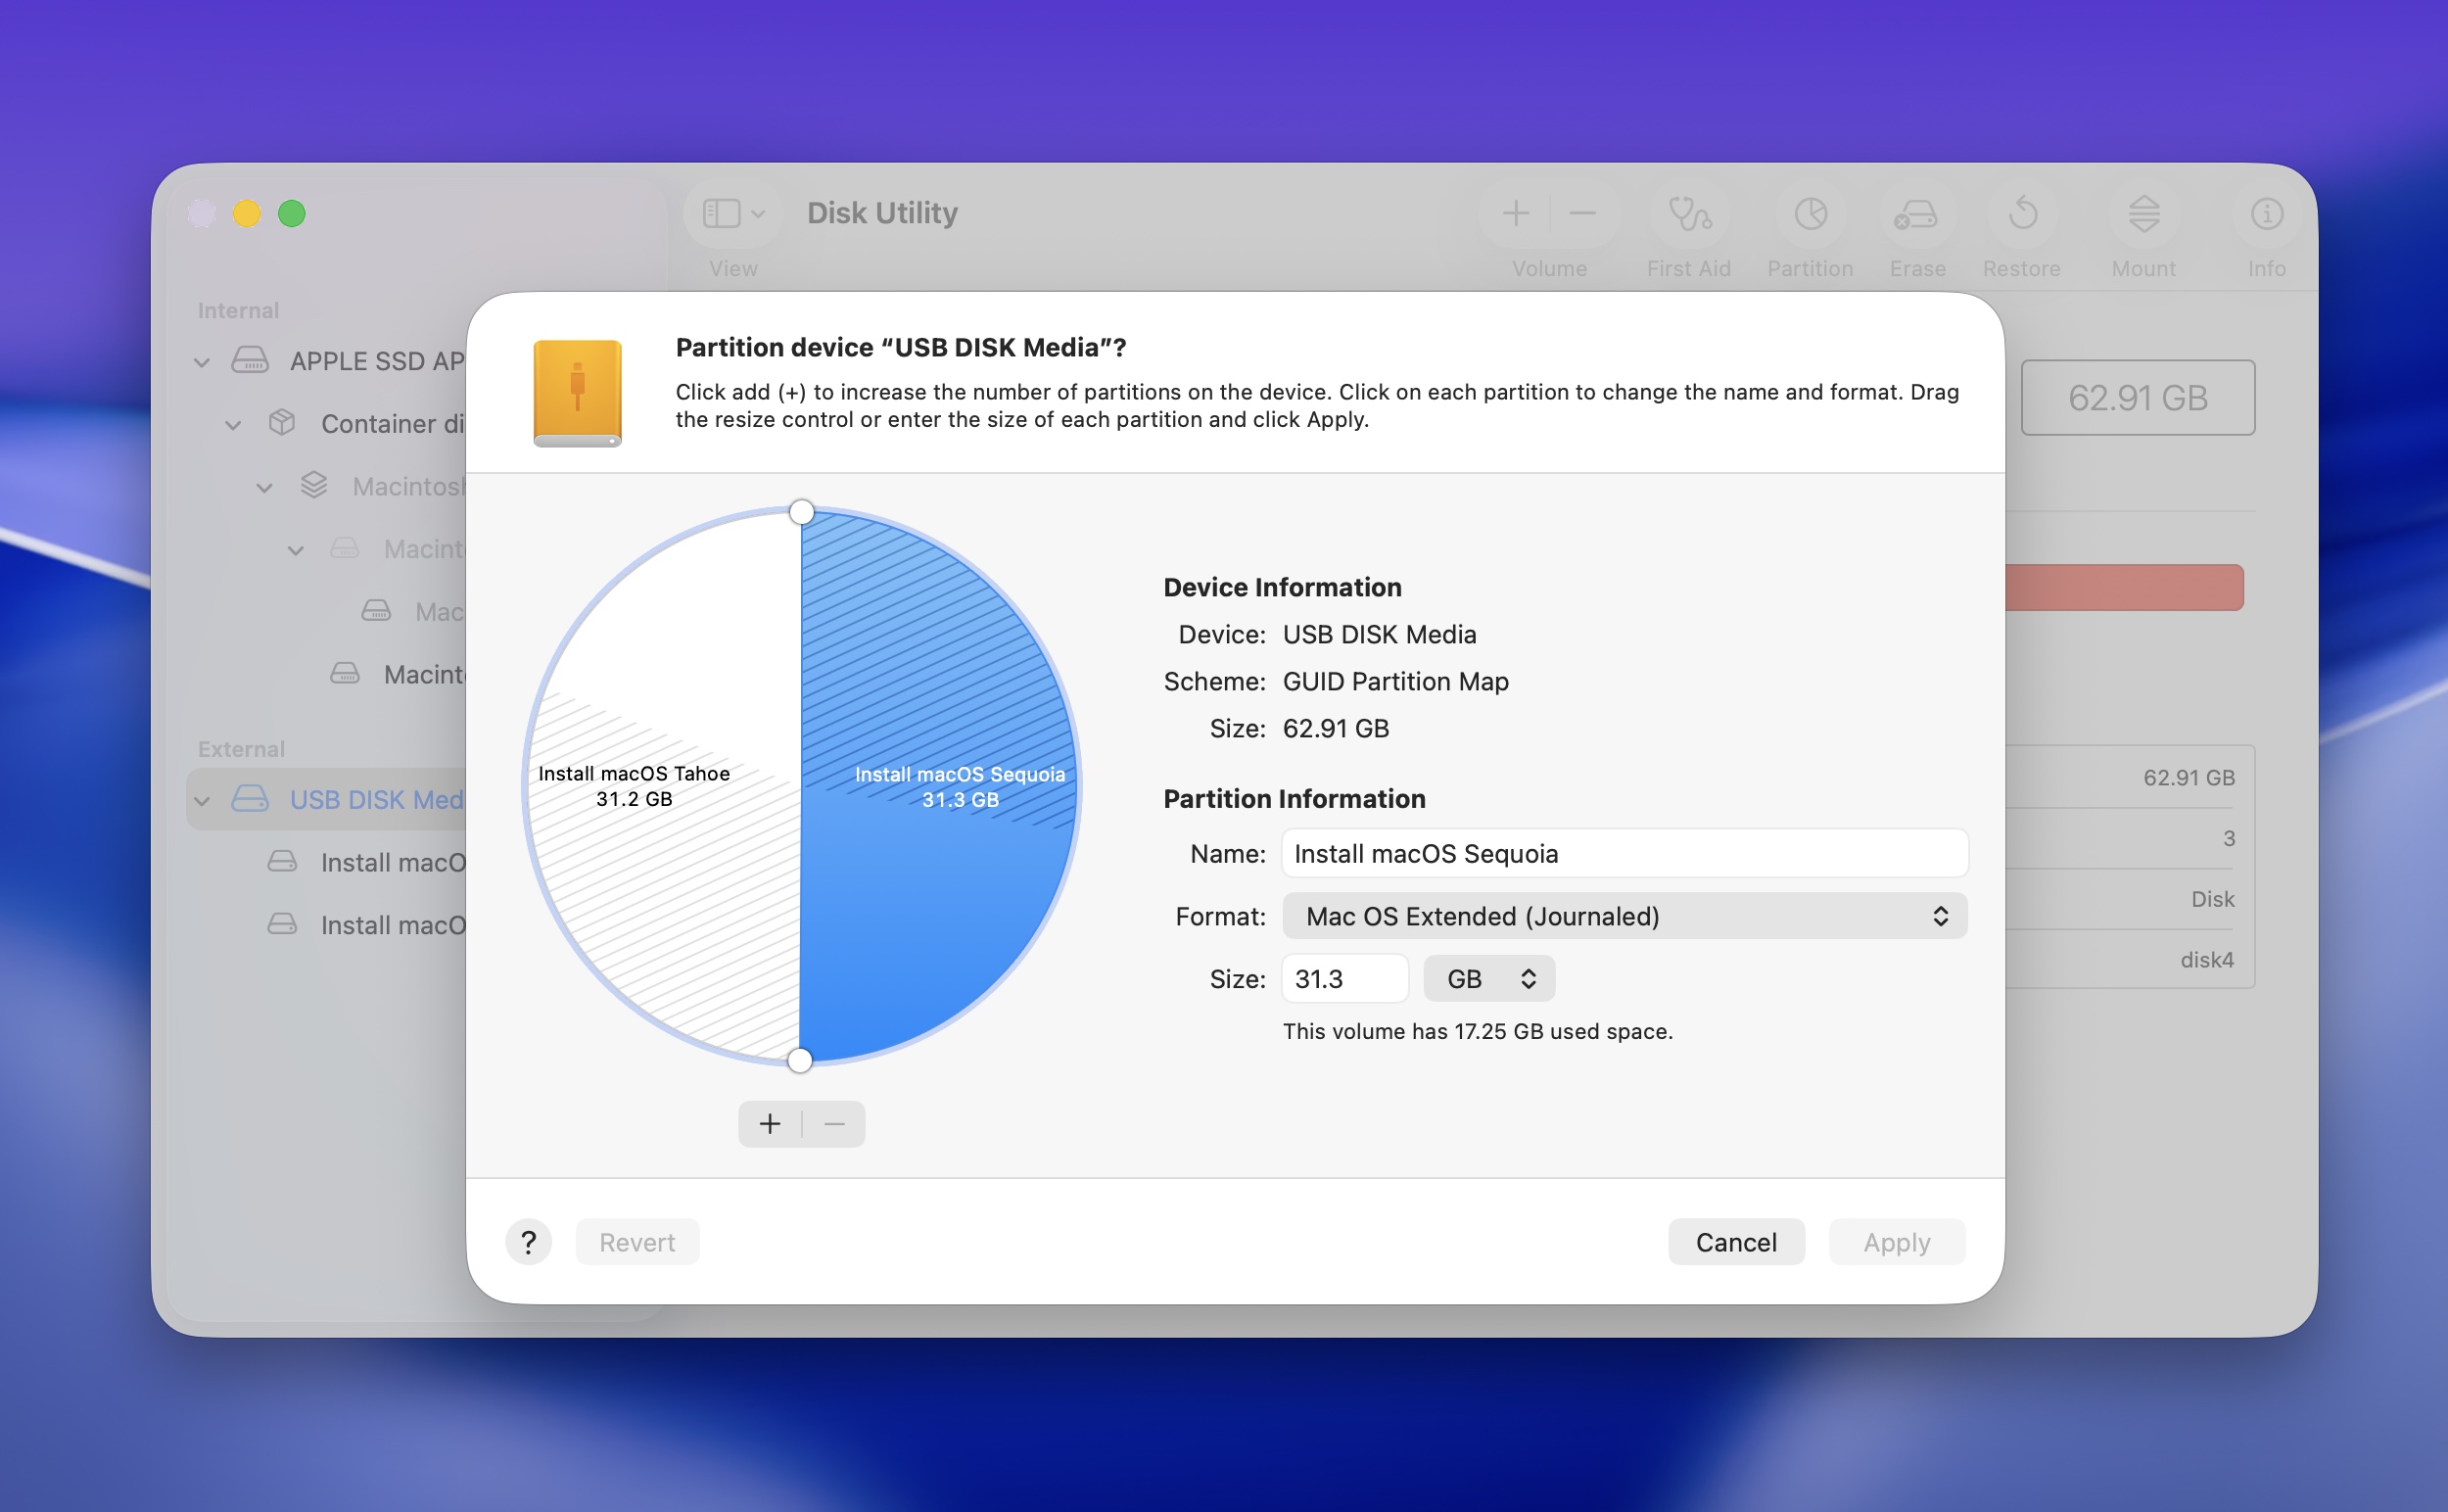
A 64GB disk is large enough to hold two or three macOS installers at once.
Andrew Cunningham
Settings for formatting your USB disk to get it ready for a macOS installer.
Andrew Cunningham
A 64GB disk is large enough to hold two or three macOS installers at once.
Andrew Cunningham
While the installer is downloading, install and prepare your USB drive. Open Disk Utility, click the View button, and select “show all devices.” Click the root of your USB drive under the “external” header in the left sidebar, and click the Erase button in the upper-right control area.
Change the disk’s name to whatever you want—I use “MyVolume” so I don’t have to change Apple’s sample terminal commands when copying the installer files—and make sure the Format is set to Mac OS Extended (Journaled) and the Scheme is set to GUID Partition Map. (That’s not an error; the macOS installer still wants an HFS+ filesystem rather than APFS.)
The handy thing is that if you have a larger USB drive, you can create installers for multiple macOS versions by partitioning the disk with the Partition button. A 64GB drive split into three ~21GB partitions could boot Tahoe, Sequoia, and another past or future macOS version; I just have it split into two volumes so I can boot Sequoia and Tahoe installers from the same drive.
Credit:
Andrew Cunningham
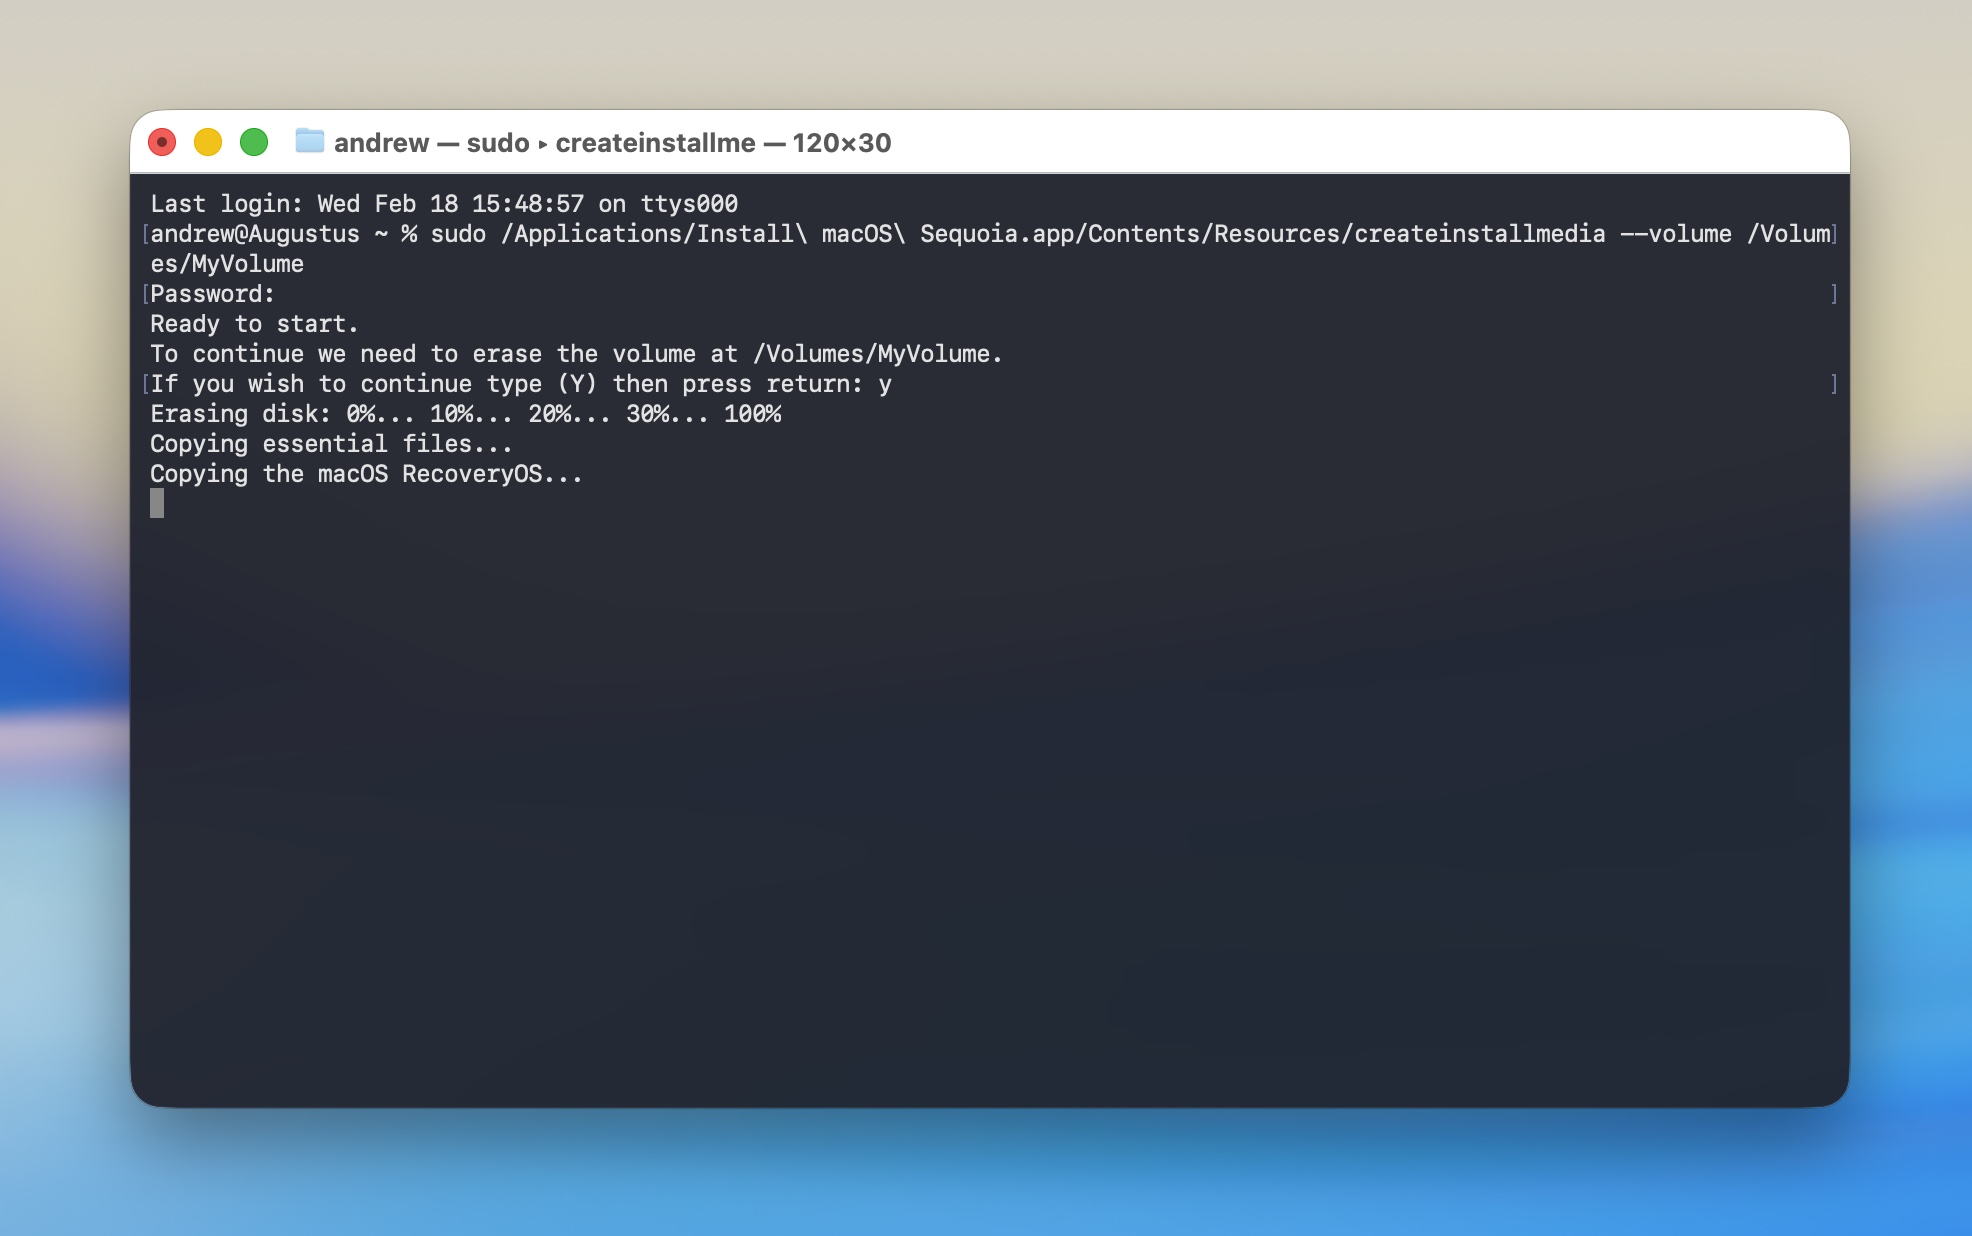
Running the Terminal command to create our macOS 15 Sequoia boot drive.
Credit:
Andrew Cunningham
Once the Sequoia installer is in your Applications folder, run a Terminal command to copy the installer files. Apple has commands for each version of macOS on this page. Use this one for Sequoia:
sudo /Applications/Install\ macOS\ Sequoia.app/Contents/Resources/createinstallmedia --volume /Volumes/MyVolume
If you named the USB drive something other than MyVolume when you formatted it, change the name in the command as well. Note that names with spaces require a backslash before each space.
The Terminal will prompt you for your password and ask you to type Y to confirm. It will then reformat the drive and copy the files over. The time this takes will vary depending on the speed of the USB drive you’re using, but for most USB 3 drives, it should only take a few minutes to create the installer. When the Terminal command is done running, leave the disk inserted and shut down your Mac.